Search This Blog

Wednesday, 20 May 2015

STEP 6: Installing Oracle Data Integrator

  1. Installing Oracle Data Integrator
2.

3. Wait for few minutes…
https://lh6.googleusercontent.com/k50illRdbW8HVVfn4USycAeL7vgRtkYYnzN-JcYEIDhR-_XMYXmrOlod2umW3ZrEuD9PTCIIbmHI0VCISp5uIKrw-7phPODg0pZhuFWVvUJBwf9CI5bIXS0tq0L83sOG0A
https://lh3.googleusercontent.com/o8XO2qn6iBRw64OgsbsQTLpcAgy6YWdvQRLQGObo-f-s0evbQ6J808i9rAO47HKmtZmvI13UoMm-XHu4Kcb0gMKeq0Aet2_BxAkhB_8N-zN48DveSuxO47Vhk0jA5R_eJQ
  1. Select Skip Software Updates → Click on next
https://lh5.googleusercontent.com/wbkYxCfY3eUCyc1LPQ3Vg7a9pAP3MZ4vHrJa85YURu-CYhtcEn-a9wLTvjy0dsi0VWmQFUVFLBPt1redxyRwOupwp8dnc2Vpi9ei3i4R7CUgwJY30PTDBfyXYuKv51LtFA
  1. Select all options except ODI Standalone Agent  → Click on NEXT
https://lh4.googleusercontent.com/ZbJp23HYmPvGXa6o9AKPotSHNLI67CsEBBGgIIs6ghJYE7l7ipAFtjfDkrEBR8Bqf31I1zeVgAxKWV1WZ36Bn01pWGHBESnPiUNwNJJ5ArFE-G9WizvVBkJ15-hsKcvBog
https://lh4.googleusercontent.com/OcNNzC6mtZA7PaqZYjUfYECs57w94qJDrrBXf_GZxxHSGJtP0lHId52jTK8BM65M5CWLmdkNK_Mkr7EnDzXLmfkF8xdWtkYA_V0btcmcCksah2f_Frs-KFxIr8sh0eClPg
https://lh4.googleusercontent.com/Z2VLvzj_9IEyU2kNvV3vPNhzNY5vh1jKQhojd3148azHlp-_45q-27mRuhSsshg34HtD0tbpZU7UTq1s9nDVrRXXbbUfFICb8KfqS3kmQBOYVz85KQ-ybVYBkxuGV1Kkug

Note: The installation of Oracle Data Integrator in other locations is not supported for BI Applications.
https://lh4.googleusercontent.com/08y2SAz43GDHiFzZ2c8KjE1l2RkSDUeKTIYG15aYbMs_R-dvAXx-1wtxqk5rR2MpMb7nKbphO7-9HMewcBNjUshUyQ0McEDUNxU9KR0n361L-jXwTiSSaaLm80_uGBQClw
Select Skip Repository Configuration → Click on NEXT
NOTE: You will create the Oracle Data Integrator Repository for Oracle BI Applications later when you run the Business Analytics Applications Suite RCU.
https://lh5.googleusercontent.com/5IUbbBvS70gUhAamcpntAGiLYVaJQX5rxhm9lGj_816Xh46eVpEy-RNN-to-MUS5T9sQecCdB14nHy79HTyZIUESp1ML5X6feHed-X_vWT7e3uyH9QFm9-nsfFX3dKEX6A
https://lh4.googleusercontent.com/4eOmJWvQ7699t6jsCetRVIm0bDmarU8O1urlvvxODmaaXnGzK9lqFaRpgUFgUlhlDfIoymZsk8v4ZtwbLDSQjTJY7d3jIlNGLvkfSECjMfVpo5fHL5KLaEmXoRwjhquWVA

  1. https://lh5.googleusercontent.com/CoohgogEa8LzH689mmMQjcYNgx-3tpq10tmveq5LSBCwl78yVoSJj9s8JRK5ozMTcCjl2W7FFt9y-VDTELoRZ6Bi-wT1UzNaOCsMfX5rHf0zjCQE5tmzsOif5cKzdhddXg
  1. https://lh3.googleusercontent.com/9mht6XIK6DYa45iVCFwPdJ33j6FvIy2s_Z63s7zluuDYjoI2SCoKrLyFJj6exnrHkHyM2BYiOvgEHMgQ9_ZSVakWb34ZdAI2hTTSNN-GBfGM_9JhWSZOEc8zP1h9xf_VpQ
    

STEP 5: Upgrading to WebLogic Server 10.3.6

Important Note :

1. Oracle BI Applications requires WebLogic Server 10.3.6.
2. If you installed Oracle BI EE in Enterprise Install mode, then WebLogic Server 10.3.5 was            automatically installed.
3. You must now upgrade to WebLogic Server 10.3.6.
4. The WebLogic Upgrade Installer allows you to upgrade to WebLogic Server 10.3.6.

How to upgrade Web logic Server (WLS) 10.3.5 to 10.3.6 in Windows 64 Bit.


Pr-requisite before Upgrading:


1.Shutdown WebLogic Server and the Oracle Business Intelligence by selecting:

Start > All Programs > Oracle Business Intelligence > Stop BI Services and stopped Oracle WebLogic NodeManager (c_Middleware_wlserver_10.3) service

2. Download the  Patch - p13529623_1036_Generic.zip from Oracle Support site.

How to download the patch ? 
 Screenshot shows the patch for Linux. Similarly you can choose windows from drop down option.


3. Unzipp the p13529623_1036_Generic.zip, you will find the following file:
     wls1036_upgrade_generic.jar
4. Backup Middleware folder and inventory directory.

5. Check the Java version.For WebLogic 10.3.5 installations you need JDK6, but you can also use it for WebLogic 10.3.6 installations.

6. WebLogic 10.3.6 installations can use either JDK6 or JDK7 depending on your requirements. This is the same JDK7 you will use for development or production servers. Do not use JDK7 for an Oracle BI Apps 11.1.1.7.0 installation.

7.  

Upgrade :

1. (UNIX or Linux only) Include the -d64 flag in the installation command when using a 32/64-bit  hybrid JDK (such as for the HP-PA, HPIA, and Solaris64 platforms). For example, if installing in graphical mode using the Package installer:
  • java -d64 -jar wlsversion_generic.jar
2. If you are using the Sun 64-bit JDK, use the following command to install WebLogic Server: Navigate to the patch folder. Run the command
    java -Xmx1024m -jar wls1036_upgrade_generic.jar 
      OR for 32 bit java 
   java  -jar wls1036_upgrade_generic.jar
    

3. 
     

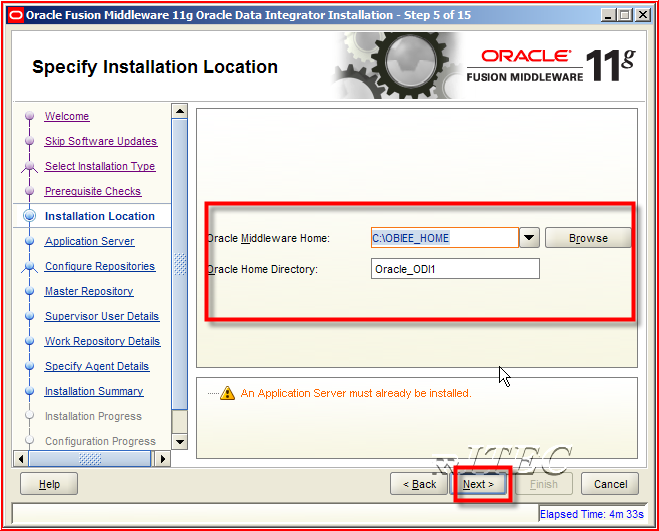
4.  For upgrading choose 'Use an existing Middleware Home'  You will see the Middleware Home 
     Directory greyed out.
 

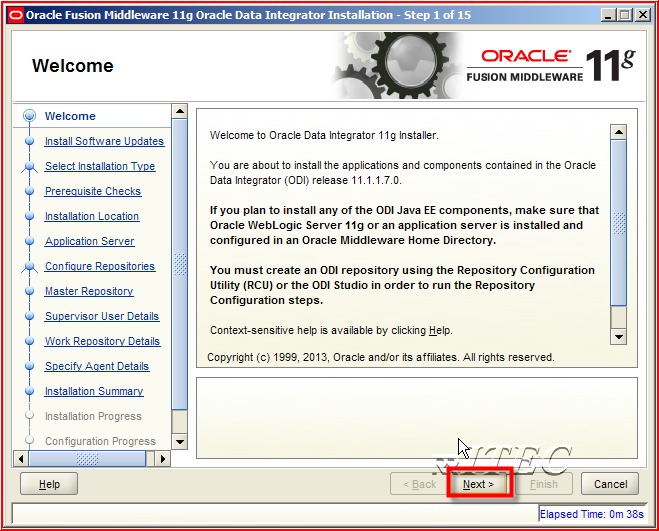
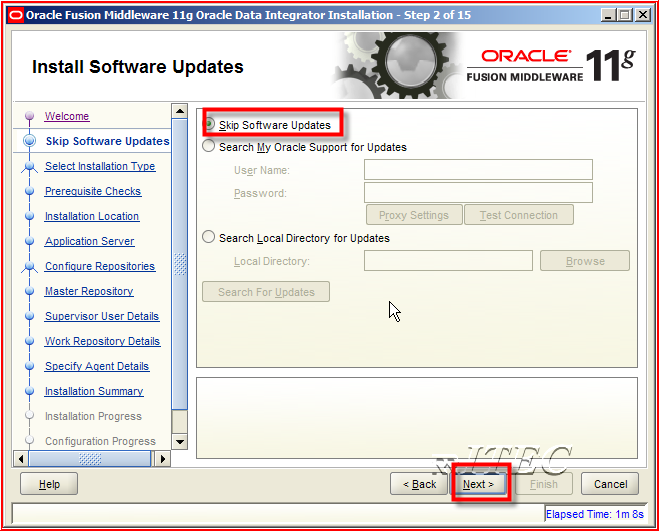
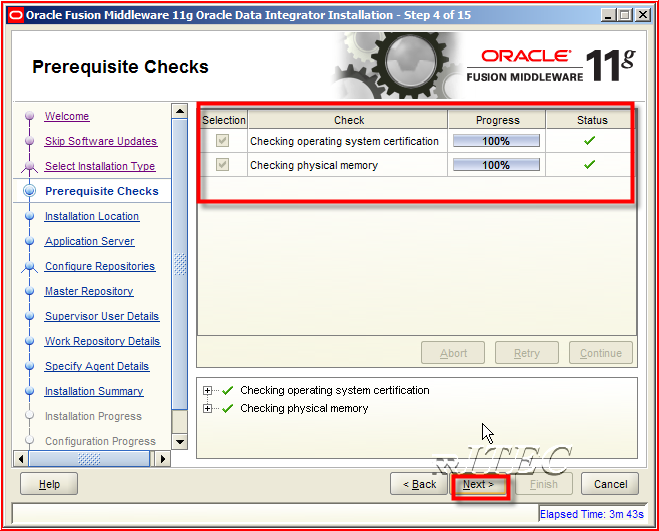
5. Next follow the GUI on screen instructions for Upgrade.

Post Installation : 

How to check/verify the Weblogic version ?

1.  Once the server is started you can access the administrator console using the "http://hostname:7001/console" URL. Log in using the username and password
2.   

 3.


4.   Run the following command

java -cp /optional/Oracle/Middleware/wlserver_10.3/server/lib/weblogic.jar weblogic.version –verbose

STEP 4: Configuring Oracle Business Intelligence


Note: If you installed Oracle BI EE in Enterprise Install mode, you do not have to perform this procedure.
1. You need to perform this procedure if you installed Oracle BI EE in Software Only Install mode.
2. The config.bat and config.sh files are located in <BI_Oracle_Home>/bin.
3.When running the config.bat file (or config.sh on Linux/UNIX), do the following:
On the Create or Scale Out BI System screen, select Create New BI System.
Note: Do not scale out the BI Domain.
4. On the Configure Components screen, for Oracle BI Applications release 11.1.1.8.1, you must select the following four options: – Business Intelligence Enterprise Edition. – Business Intelligence Publisher (will be automatically selected). – Real-Time Decisions. – Essbase Suite.

STEP 3: Installing Oracle Business Intelligence Enterprise Edition 11g

Important Points to Note for Oracle BI Applications 11.1.1.8.1:


1. Oracle BI EE must be deployed in weblogic.
2. IBM websphere is not supported for OBI Applications 11.1.1.8.1.
3. Installing Oracle BI EE in Simple Install mode is not supported for OBIA.
4. Installing Oralce BI EE in windows 32 bit and Linux 32 bit is not supported for
Oracle BI Applications.
5. Install Oracle BI EE in Enterprise Install for Oracle BI Applications 11.1.1.8.1;
choose the following:
- Business Intelligence Enterprise Edition. - Business Intelligence Publisher. - Real-Time Decisions. - Essbase Suite.


OBIEE 11.1.1.7.0  Installation Steps


If you don’t want the support choose ‘Skip Software Updates’


Enterprise Install will deploy : Admin Server and BI_Server1 Managed Server in Weblogic.
Password : Admin123
Click On ‘YES’ and proceed further


If you don’t want to get information on critical security issues from ORACLE, De-Select Check box.
For the following Pop up window CLICK on YES
Click SAVE button to generate a response file. Click on Install Button.


For few times, the following pop up window will ask for OBIEE installation files location for Disk3, Disk4 and Disk2.


Click to Finish.
Open the Web browser:
To login to Console: http://localhost:7001/console
To login to Enterprise Manager: http://localhost:7001/em
To login to Analytics:  http://localhost:9704/analytics


Tuesday, 19 May 2015

STEP 2: Oracle Fusion Middleware Repository Creation Utility 11.1.1.7.0

Installing Oracle WebLogic Server

1.  If you choose to install Oracle BI EE using the Enterprise Install option, then you do
not have to perform this step, because WebLogic Server 10.3.5 is automatically installed. 

2    However, you must upgrade to WebLogic Server 10.3.6 after the Oracle BI Applications installation is complete.


Oracle Fusion Middleware Repository Creation Utility 11.1.1.7.0


OBI Apps 11.1.1.8.1 Installation and Configuration in Windows 7 64 Bit

Step 1: Installation Prerequisites

1. Microsoft Loopback Adapter should be configured.
       
2. Oracle Database 11.2.0.4 for OBI Apps 11.1.1.8.1 as per the SRSP guide.
        System Class : Server Class
           Grid Installation Options : Single instance database installation
          Select Install Type : Advanced Install
          Select Database Edition : Enterprise Edition
          Select Configuration Type : Data Warehousing
          Specify Configuration Options : Character Sets > Use Unicode (AL32UTF8)
          Specify Configuration Options : Security > uncheck Assert all new security settings
          Specify Schema Passwords : Use the same password for all accounts ("Admin123")


3. Install JDK or JRockit.
              The Business Analytics Applications Suite installer, which you run to install Oracle BI
Applications,requires JDK version 1.6.0_35 or higher or JRockit version 6u37 R28.2.5
or higher.

Note : In OBIEE 11.1.1.7.0 comes with pre-built JDK 1.6.0_45, can utilize the same for installation and configuration of OBI Apps 11.1.1.1.8.1.

Download the OBI Apps 11.1.1.8.1 from https://edelivery.oracle.com 


Download the following softwares:


Download the above mentioned files in one common location.


Thursday, 30 April 2015

Informatica ETL data Lineage SQL Query


SELECT DISTINCT

C.SUBJECT_AREA FOLDER_NAME,
C.MAPPING_NAME MAPPING_NAME,
C.SESSION_NAME SESSION_NAME,
E.READER_WRITER_TYPE,
E.INSTANCE_NAME,
E.CNX_NAME,

CASE
WHEN E.WIDGET_TYPE = 2
THEN 'TARGET CONNECTION'
ELSE
CASE
WHEN E.WIDGET_TYPE IN (1, 3, 56, 45, 55, 84)
THEN
'SOURCE CONNECTION'
ELSE
NULL
END
END CNX_TYPE

FROM INFA_REPO.REP_VERSION_PROPS A,
     INFA_REPO.REP_USERS B,
     INFA_REPO.REP_LOAD_SESSIONS C,
     INFA_REPO.REP_REPOSIT_INFO D,
     INFA_REPO.REP_SESS_WIDGET_CNXS E

WHERE ( A.USER_ID = B.USER_ID
AND C.SESSION_ID <> D.REPOSITORY_ID
AND C.SESSION_ID = A.OBJECT_ID
AND C.SUBJECT_ID = A.SUBJECT_ID
AND A.OBJECT_TYPE = 68
AND C.SESSION_ID = E.SESSION_ID
AND C.SESSION_VERSION_NUMBER =
E.SESSION_VERSION_NUMBER)